WinStudio
Vertical grid components allow data to be displayed and maintained in a tabular format, somewhat similar to a grid component. The primary difference between the grid component and the vertical grid component is in the way the data is displayed: A standard grid component typically displays a header row that acts as labels for each of the columns, where each record displays in a row, and the associated data for each record displays in the cells of each column. In a vertical grid component, there are only two columns: The "header row" labels display in the left and the data associated with each label displays in the corresponding cell of the right column. So, in a sense, the data for each record displays as series of name-value pairs.
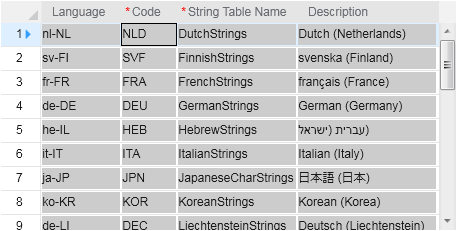
Regular grid component:
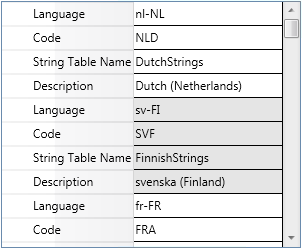
The same data displayed in a vertical grid component:
The vertical grid component is a container for vertical grid elements. The vertical grid repeats rows of data as sets of name-value pairs. Each name-value pair for a record represents a vertical grid element for that property.
A vertical scroll bar can be used to view records below the viewing area, or not used. If the vertical scroll bar is not used, you must use another device such as up and down arrow buttons that use scripting APIs to move the user through the records.
The first element in a vertical grid becomes, in effect, the "row header," visually representing the status of the row and the fact that it starts a new record. This element typically displays using the same color as the header row in a standard grid. The status of the record, if any, displays in this element, the same as with the first column of a record in a standard grid.
A vertical grid can be bound to a primary collection, a secondary collection, or a subcollection. A collection bound to a vertical grid is displayed and maintained in the grid.
To bind a vertical grid to a primary or secondary collection, specify the collection in the appropriate WinStudio dialog box. To bind a vertical grid to a subcollection, specify the parent collection and the subcollection property that references the subcollection. You must also specify the standard properties for the subcollection.
To add a vertical grid to a form:
With the form open, enter Design mode.
On the Controls tab of the Toolbox, click Vertical Grid.
Click the form where you want one corner of the grid to be, and then drag to set the dimensions of the grid.
Container, WinStudio Component Property