Shop-Trak Creating & Printing Employee Badges
This topic describes how to create and print employee badge labels.
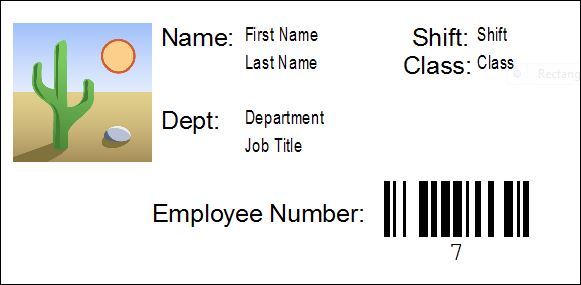
The BarTender label software is used to create the badges. A
default badge format is included in your Shop-Trak download package. You
can use the default badge as-is or customize it for your organization.
Some setup is also required using the Shop-Trak
Parameters and Shop-Trak Label
Rules forms. You can then print the badges using the Print Badge button on the Shop-Trak Employee Profile form.
Creating Employee Badges
To create employee badges using BarTender:
- Open the BarTender label software.
- Select Open
an existing BarTender document.
- Select the default employee
badge, Employee Badge.btw,
located in the BTLabels folder
of your download package:
- You can use the badge as-is, or customize it for your organization
by adding, changing, or deleting objects. For example,
to add new label and data source objects for Middle Initial:
LABEL OBJECT
- Select an existing label object
on the badge (e.g. Dept:),
and Copy/Paste it to the desired location.
- Double-click on the object.
- Select the
Data Source tab.
- Erase the old label name and
specify a new one in the Embedded
Data field (e.g. MI:).
- Click Close.
DATA SOURCE OBJECT
- Select an existing data source
object on the badge (e.g. Department),
and Copy/Paste it to the desired location.
- Double-click on the object.
- Select the
Data Source tab.
- Click the Change
Data Source Name button at the end of the Name
field.

- Select Create
a new named data source and specify the data source name
in the Name field. The
available badge data sources are listed in the table below. Specify
the data source using the format
tablename.fieldname. For example, specifying employee.mi will print the employee's
middle initial from the Employee
table.
Tables and Fields for
Employee Badges |
Table & Field Descriptions |
Table & Field
Names |
| Department |
dept |
Department
description |
description |
Division
number |
div_num |
| Employee |
employee |
Employee
number |
emp_num
|
Last name,
first name, middle initial |
name |
Last name
|
lname |
First
name |
fname |
Middle
initial |
mi |
Department
number |
dept |
Shift
number |
shift |
| Employee
Position |
emp_pos |
Job ID
number |
job_id |
Job detail
number |
job_detail |
| Employee
Position History |
emp_hpos |
Company
name |
comp_num |
Job title |
job_title |
Job classification
number |
class |
Job grade
code |
jobgrade |
Supervisor
number |
super_num |
| Shop-Trak
Employee Profile |
lc_lt_employee_profile |
Shop-Trak
ID |
EmployeeID |
Primary
Supervisor |
supervisor_primary |
Alternate
Supervisor |
supervisor_alternate |
Administrative
Supervisor |
supervisor_admin |
User defined
integer field |
intfld1 |
User defined
decimal field |
decifld1 |
User defined
character field |
charfld1 |
User defined
integer field |
intfld2 |
User defined
decimal field |
decfld2 |
User defined
character field |
charfld2 |
- Click OK.
- On the Data Source
tab:
- Keep the type as Embedded Data.
- Specify a new data source
description in the Embedded Data
field (e.g. Middle Initial).
This description appears on the badge when displayed in
BarTender. When the badge is printed, the actual data from
the table replaces the description (the employee's actual middle
initial).
- Click Close.
- Save the badge to a shared network path that is accessible to the
workstation that will be printing the badges. You can rename
the badge if desired. For example, you might want to create
different badges for each department, naming them accordingly.
- For more information on using BarTender, please refer to the BarTender
Online Help.
Setting Up Label Parameters and Rules
To set up Shop-Trak to print employee badge labels:
1. Enable Label Printing Using the Shop-Trak Parameters Form
- Main Tab
- Open the Shop-Trak Parameters
form and select the Main tab.
- Select the Labels check
box in the Available Menu Options,
Info section.
- Save the changes.
2. Specify the Badge Path Using the Shop-Trak Parameters Form
- Labels Tab
- Select the Labels
tab on the Shop-Trak Parameters
form.
- Select the Employee Badges
check box in the Settings,
Label Print Options section.
- Specify the shared path to the employee badge file in the Path to Emp. Badge Formats (.btw)
field. Or, click Browse
to select the path by navigating to the correct folder.
- If you have an area on the badge for employee photos, specify
the shared path to the photos in the Path
to Emp. Badge Images field. Or, click Browse
to select the path by navigating to the correct folder.
- Save the changes and close the form.
3. Specify a Rule Using the Shop-Trak Label Rules Form
- Open and unfilter the Shop-Trak
Label Rules form.
- Select E (Employee
Badges) from the Type
list. This is a required field.
- Select the * (asterisk)
from the Department list
to designate the same badge for all employees. If
the badge is specific to a department, select the department
number from the Department
list.
- Specify the label's file name (the .btw file) in the
Label Name field (e.g. Employee
Badge.btw).
- Specify the printer name in the Printer
field. Type the printer name exactly as it is listed in
the Windows Control Panel.
- Save the changes and close the form.
Printing Employee Badges
To print an employee badge:
- Open
the Shop-Trak Employee Profile form and select
the General tab.
- Filter for the employee who needs a badge printed.
- Click
Print Badge.
- Shop-Trak
verifies that:
- The
parameter to enable employee badge printing is checked.
- There
is a path specified to the labels and the labels are accessible.
- If
there is an image on the label, the path to the image is specified
and accessible.
- There
is a label rule set up for employee badges:
- If
there is a default badge for all employees, it will send the
employee information from the Shop-Trak
Employee Profile
form to the default label format and print the badge to the
specified printer.
- If there is a department
specific rule defined for the employee's department, it will
send the employee information from the Shop-Trak Employee Profile form to the label format
specific to that department and print the badge to the specified
printer.
Related Topics
Shop-Trak Defining
Main Parameters
Shop-Trak
Defining Labels Parameters
Shop-Trak
Setting Up the Employee Profile - General Tab
Shop-Trak Customizing Default
Labels
Shop-Trak Defining Label Rules